Stop staring at that blank, white void behind your headboard. It’s depressing, right? You spend a third of your life in bed, so letting that space remain a decorative wasteland seems like a crime.
I’ve rounded up 13 DIY bedroom accent wall behind bed ideas that range from “I have a hammer and zero skills” to “I’m basically a contractor now.” Let’s fix your room before you hit snooze again.
1. Classic Board and Batten
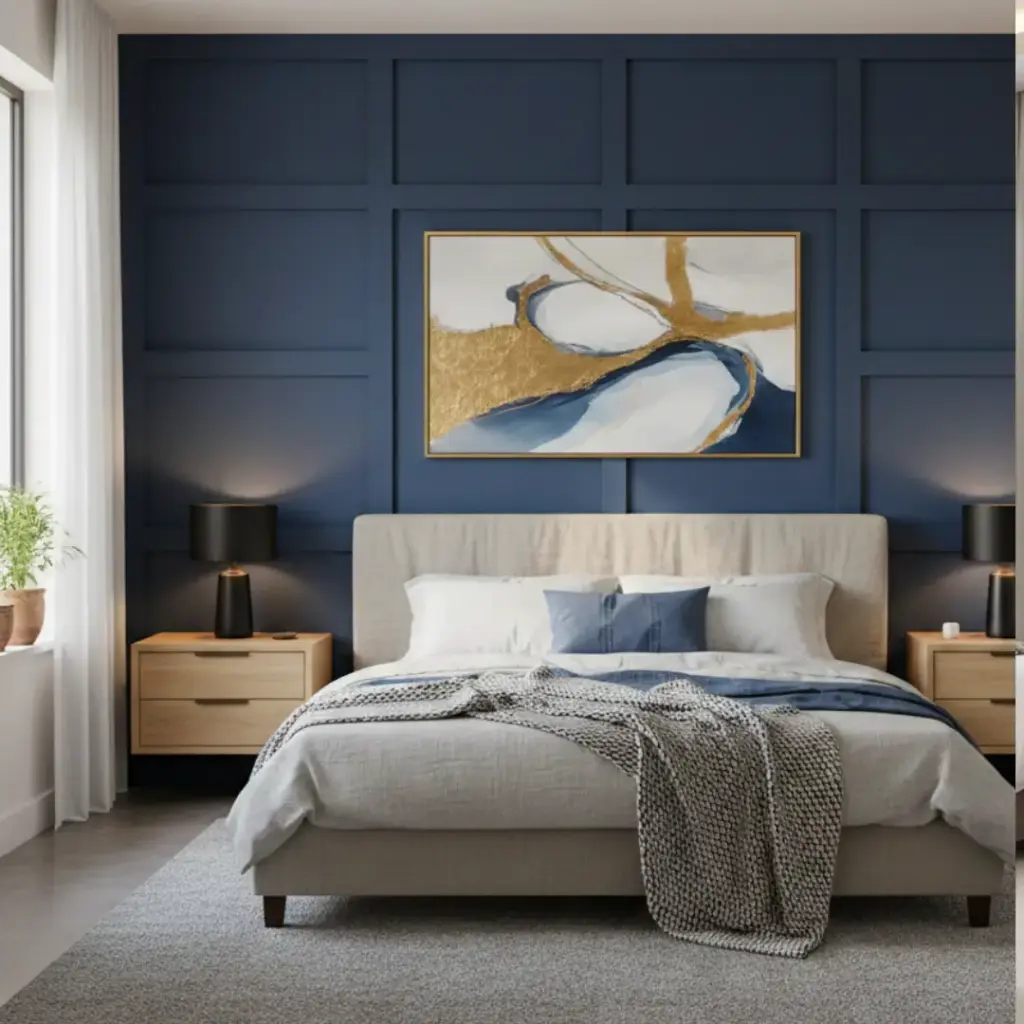
I love this look because it screams “expensive custom build,” but it actually costs pennies. You essentially create a grid pattern using wood strips (battens) over your existing wall. It adds texture and depth without overwhelming the space.
Why it works:
- Hides imperfections: If your drywall looks like a topographic map, this covers it up.
- Adds architectural interest: It gives a flat boxy room some serious character.
- Customizable: You choose the grid size. Big squares? Modern. Small rectangles? Traditional.
My tip: Buy a laser level. Seriously. If your lines aren’t straight, you will notice every single time you walk into the room. Don’t eyeball it unless you want a funhouse mirror vibe.
2. The Vertical Wood Slat Wall

You have seen this all over Instagram, and for good reason. Thin vertical wood strips running from floor to ceiling create an incredible sense of height. It makes even low ceilings feel vaulted.
Materials you need:
- 1×2 inch lumber or pre-cut plywood strips.
- Construction adhesive (Liquid Nails is my go-to).
- Brad nailer.
- Wood stain or clear coat.
I installed this in a guest room, and the acoustic dampening was a happy accident. The wood breaks up sound waves, making the room quieter. Use a spacer block (like a piece of scrap wood) between slats to keep the gaps perfectly consistent. It speeds up the process tenfold.
3. Moody Geometric Trim
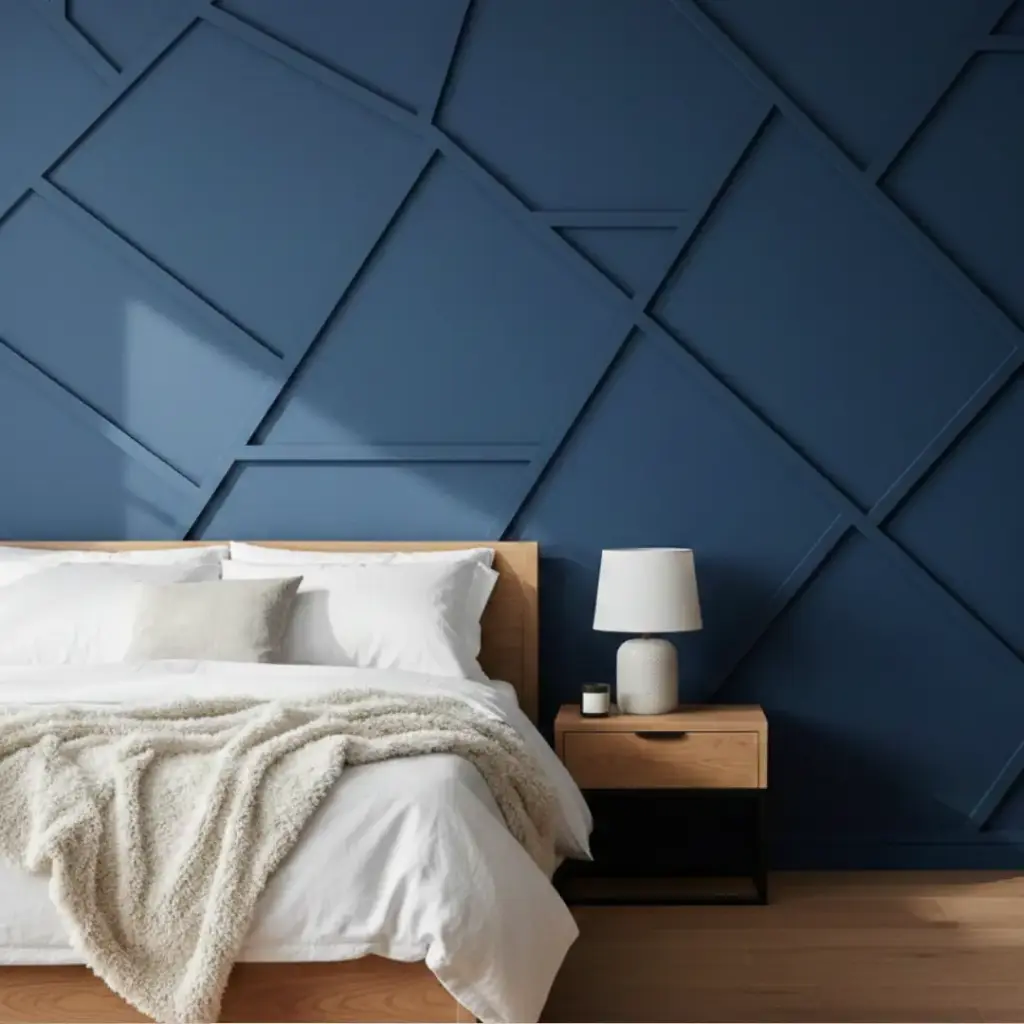
Forget squares. We are talking triangles, hexagons, and abstract angles. This involves cutting wood trim at sharp angles and arranging it in a random or calculated geometric pattern. It looks intimidating, but it’s just chop, glue, and nail.
The process is simpler than it looks:
- Sketch it out: Draw your design on the wall with a pencil first.
- Cut the angles: A miter saw is your best friend here.
- Attach and Caulk: Caulk is the eraser of the carpentry world. It fills the gaps where your angles didn’t quite match up.
Paint the entire wall—trim and all—in a single, dark moody color like charcoal or navy. The shadow lines do all the heavy lifting here.
4. Peel and Stick Wallpaper (The Renter’s Savior)

Commitment issues? I get it. Peel and stick wallpaper lets you change your mind without losing your security deposit. The technology has come a long way; the patterns actually line up now without requiring a PhD in geometry.
Top reasons to choose this:
- Zero mess: No paste, no water, no sticky floors.
- Infinite options: Florals, faux brick, textures—you name it.
- Easy removal: It peels off in full sheets when you move out.
Warning: Buy more than you think you need. You will mess up the first strip. It happens to the best of us :/. Also, ensure your wall is smooth; texture shows right through the paper.
5. The Painted Arch
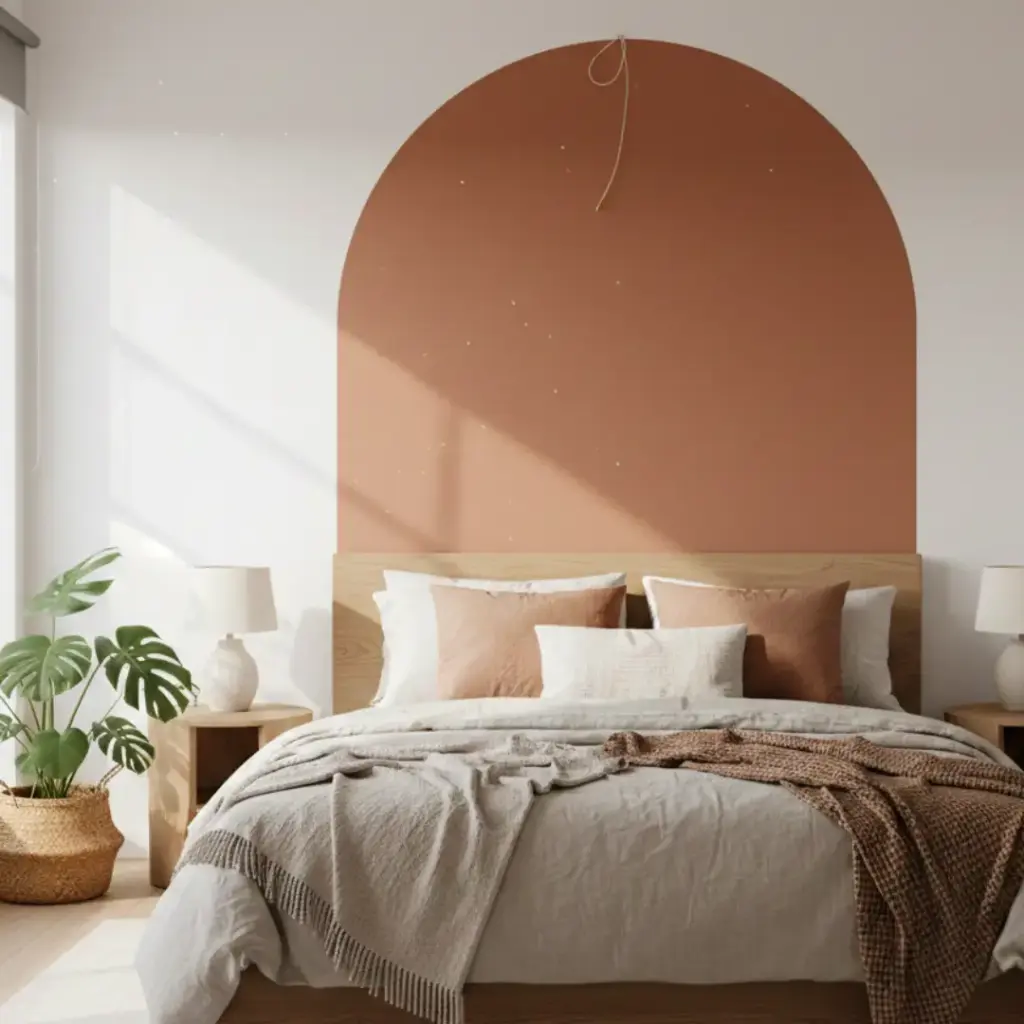
This is the cheapest idea on this list. All you need is paint, a brush, and a piece of string. Painting a solid arch directly behind the bed frames the headboard beautifully and creates a focal point without spending money on materials.
How to make the perfect curve:
- Tack a nail into the wall where you want the center of the arch.
- Tie a string to the nail and a pencil to the other end.
- Pull the string taut and draw your semi-circle.
It sounds like kindergarten art class, but the result looks surprisingly high-end. I prefer terracotta or sage green arches against white walls for that earthy, boho vibe.
6. Faux Shiplap (The Sharpie Method)
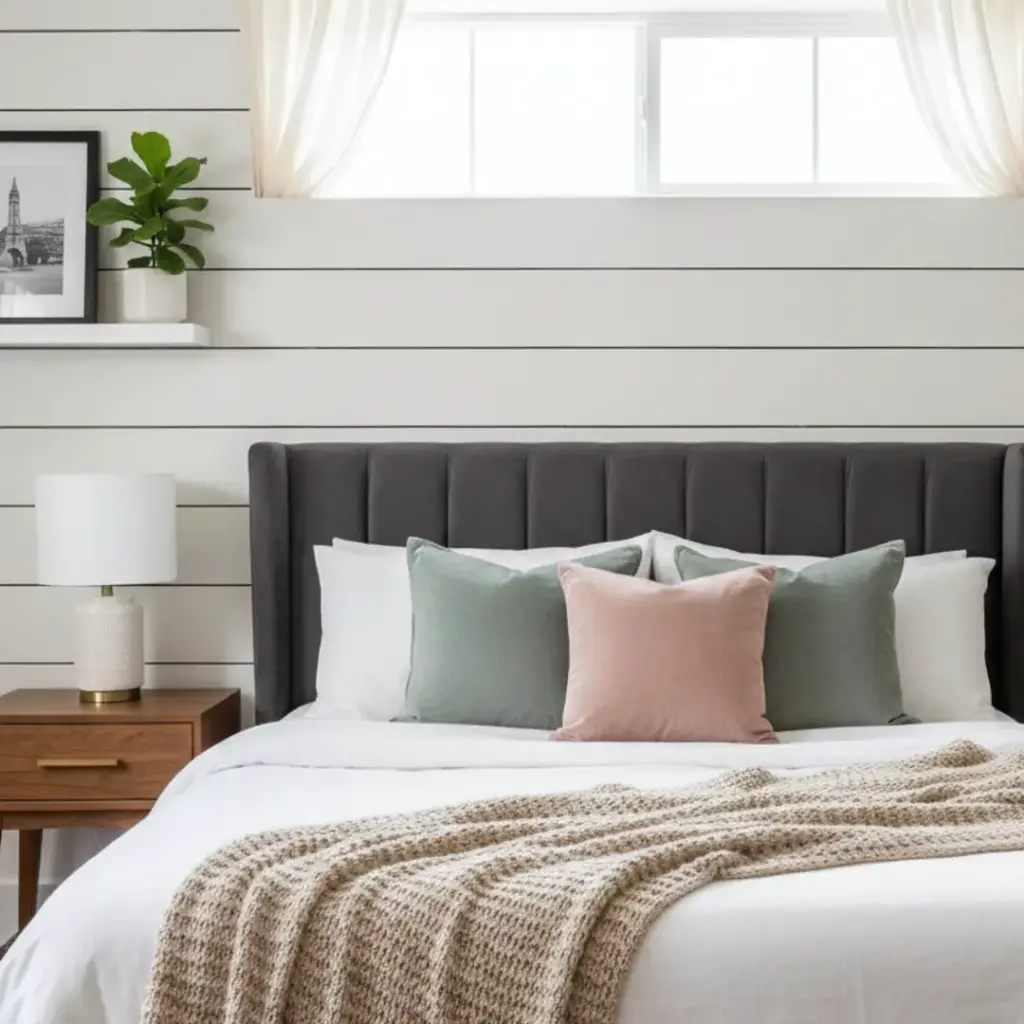
Real shiplap is expensive and heavy. If you want the farmhouse look without the lumber yard trip, use a Sharpie paint pen and a straight edge. You essentially draw horizontal lines across the wall to mimic the gaps between boards.
Does it look fake? Only if you inspect it with a magnifying glass. From two feet away, it fools everyone.
Key steps:
- Paint the wall white (or your desired base color).
- Measure and mark your horizontal lines (usually every 6 inches).
- Draw the lines using a long level and a black oil-based paint pen.
- Don’t press too hard; you want a consistent line width.
7. Oversized Upholstered Panels
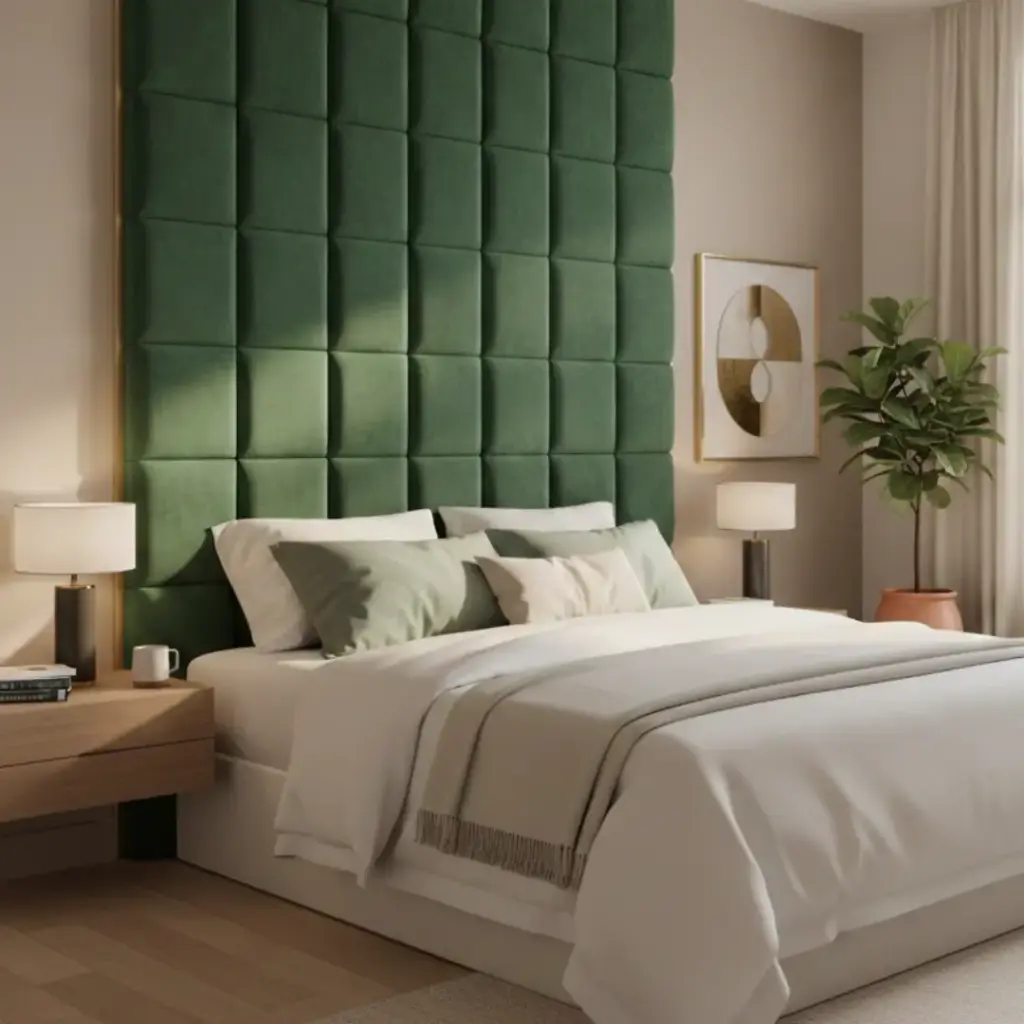
Turn the entire wall into a headboard. This brings serious hotel luxury vibes into your bedroom. You make individual rectangular panels using plywood, batting, and fabric, then mount them to the wall in a grid.
Why I love this:
- Soundproofing: It absorbs noise like a champion.
- Comfort: You can actually lean against the wall to read.
- Texture: Velvet or linen fabrics add softness to the room.
Use French cleats to hang the panels. It ensures they stay perfectly level and secure. Plus, if you get bored of the fabric in five years, you just re-cover the panels. Easy.
8. Two-Tone Color Block
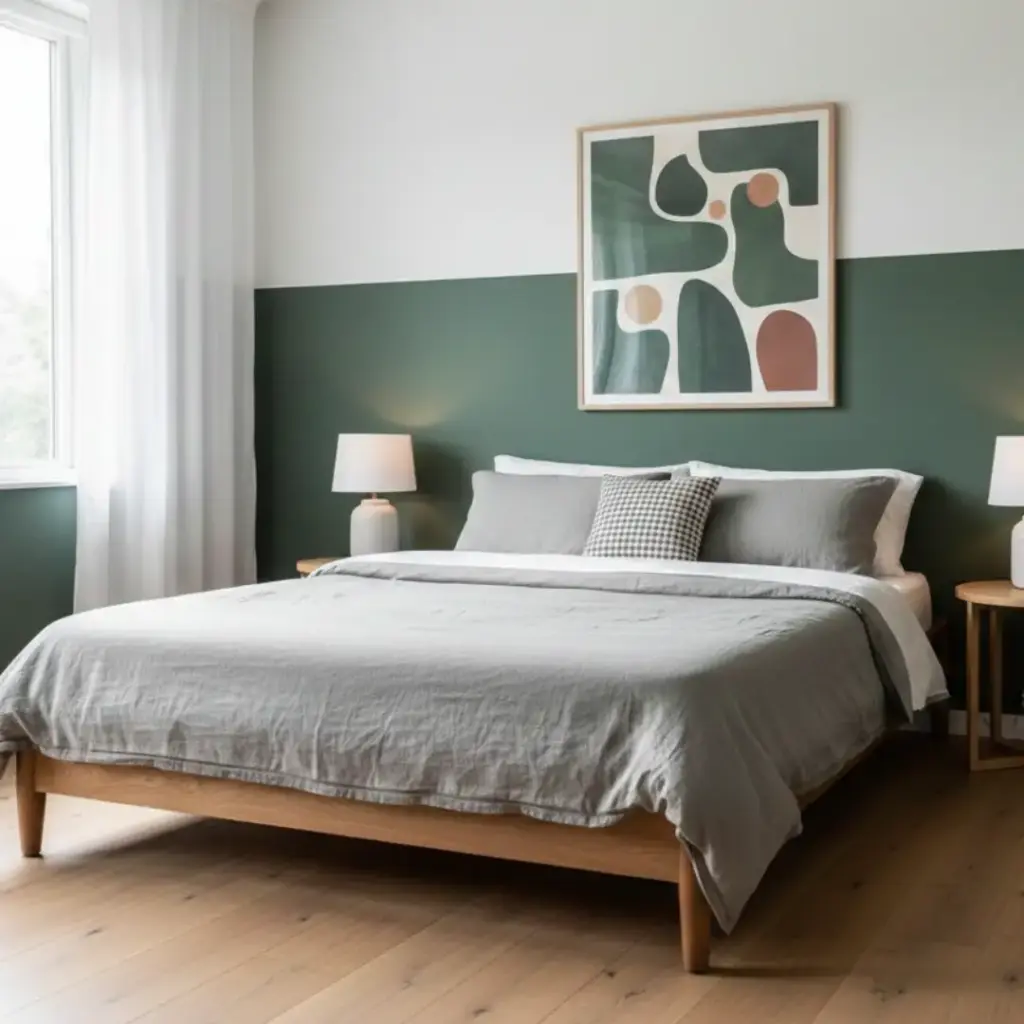
Why pick one color when you can have two? Split the wall horizontally (about 2/3rds up) or vertically. Paint the bottom half a deep, grounding color and leave the top light.
Design Logic:
- Grounds the bed: The dark color at the bottom anchors the furniture.
- Expands the space: The light color at the top keeps the room feeling airy.
- Adds height: If you paint the ceiling the same color as the top section, the walls look taller.
I recommend using painters tape specifically designed for delicate surfaces to get that razor-sharp line. Peel the tape while the paint is still slightly wet to avoid peeling the paint off with it.
9. Stencil Art “Wallpaper”
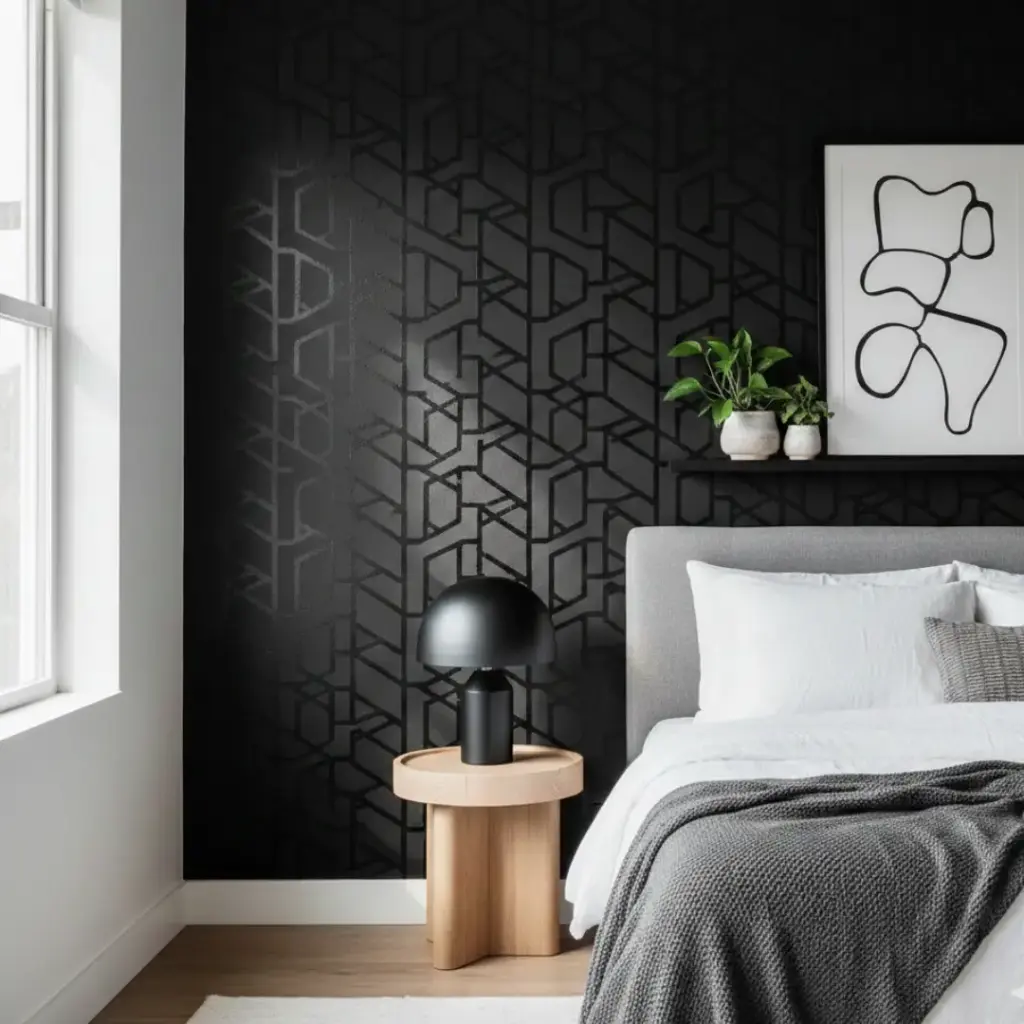
If you have more time than money, stenciling is your move. You buy a large wall stencil and repeat the pattern across the wall using a foam roller. It creates the look of expensive wallpaper for the cost of a paint can.
My honest advice: Use very little paint on the roller. I mean, wipe almost all of it off. If the roller is too wet, paint bleeds under the stencil, and your crisp geometric pattern turns into a blurry mess.
Design ideas:
- Tone-on-tone: Use a gloss paint over a matte base of the same color. It catches the light subtly.
- High contrast: Black pattern on white for a modern punch.
10. The Floating Picture Ledge
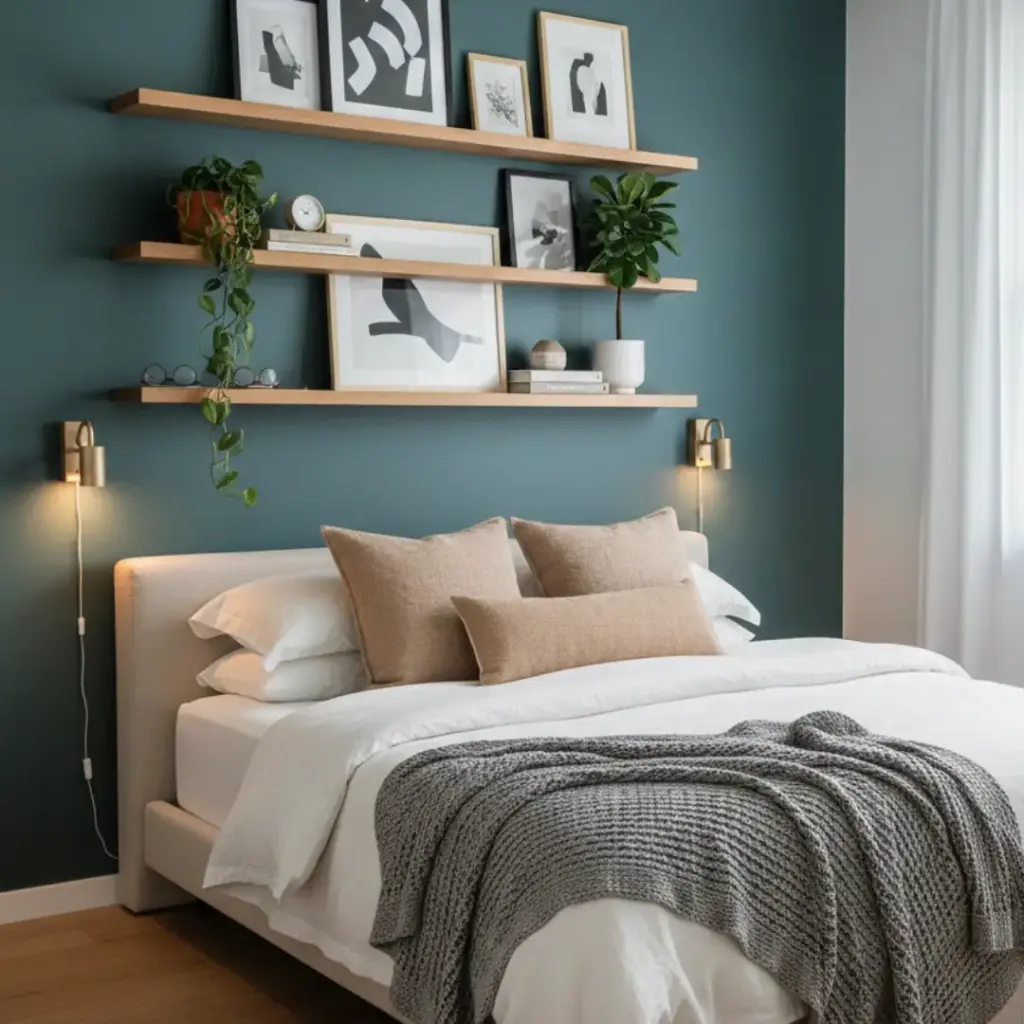
Sometimes you don’t want to touch the wall surface itself. Install two or three long floating shelves directly above the bed. Fill them with framed art, plants, and books.
Why this rocks:
- Zero commitment: You can swap the art whenever you want.
- Layered look: Leaning frames against each other looks effortless and curated.
- Storage: It doubles as a place for your phone or glasses (if you mount it low enough).
Safety first: Ensure you screw these ledges into the studs. You do not want a heavy oak frame falling on your face at 3 AM. That is not the wake-up call anyone needs.
11. Large Scale Wall Mural
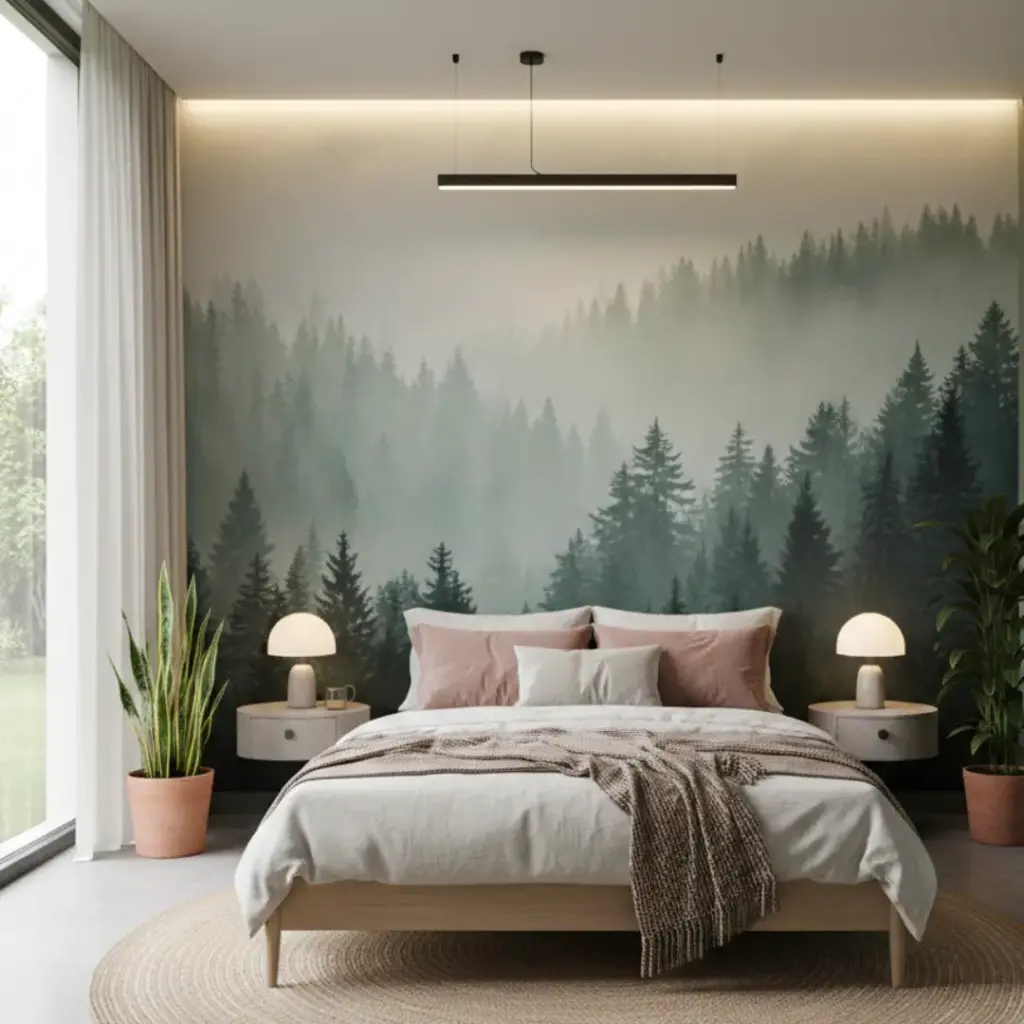
Go big or go home. A mural turns your wall into a piece of art. You can paint this yourself if you have artistic talent, or buy a pre-printed mural that applies like wallpaper.
Trending themes:
- Misty forests: Moody and relaxing.
- Abstract watercolors: Soft and dreamy.
- Botanical prints: brings the outdoors in.
I installed a “cloud” mural in a bedroom once. It felt like sleeping in the sky. Just make sure the scale of the print matches the size of your room. A tiny pattern on a huge wall looks busy; a huge pattern in a tiny room looks overwhelming.
12. Reclaimed Wood Planks
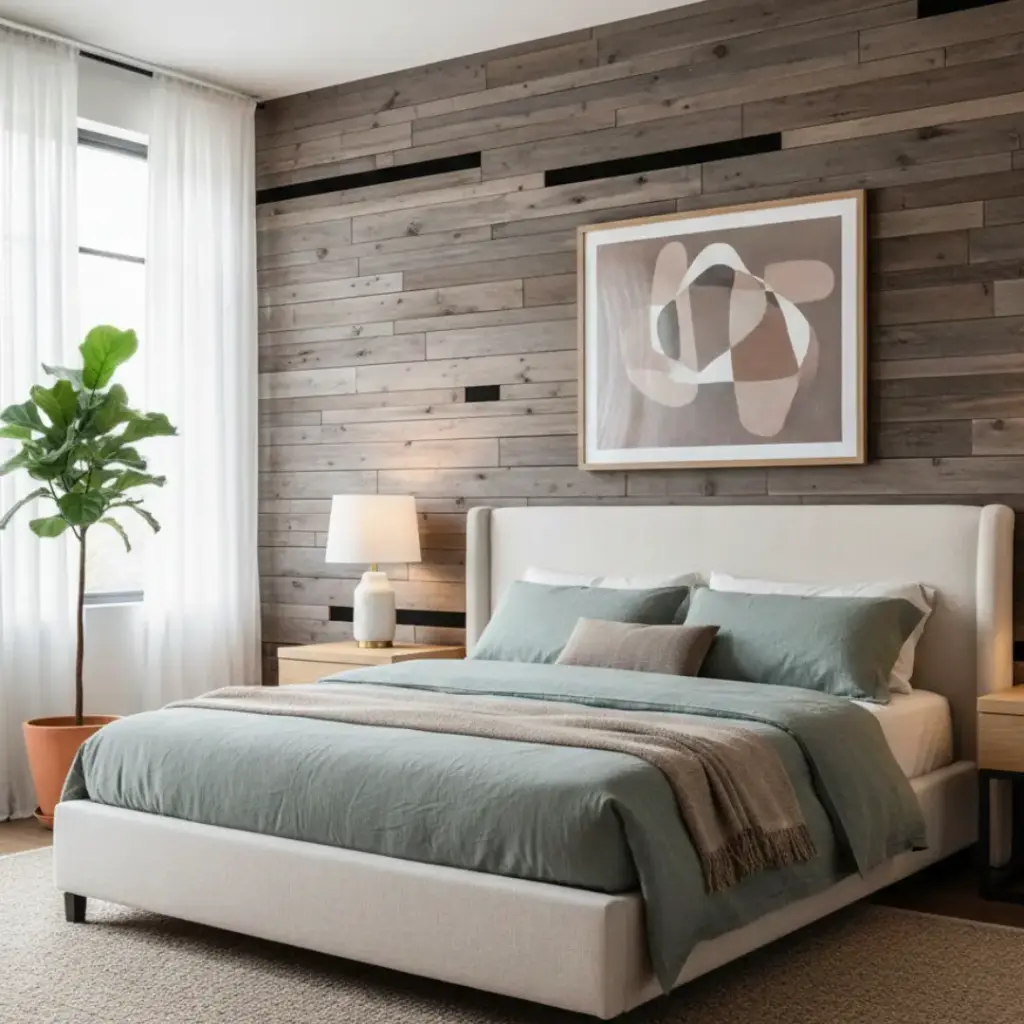
This adds instant warmth and rustic charm. You can buy boxes of peel-and-stick reclaimed wood specifically for this purpose. The wood is thin, lightweight, and comes with heavy-duty adhesive backing.
Installation tips:
- Vary the colors: Mix up the grey, brown, and blonde tones for a natural look.
- Stagger the seams: Don’t line up the ends of the boards.
- Paint the wall black first: Wood moves. If a gap opens up, you want to see black shadow, not white drywall.
It smells like wood for a few days, which is actually kind of nice. FYI, this is a permanent decision. That adhesive does not play games.
13. Washi Tape Designs
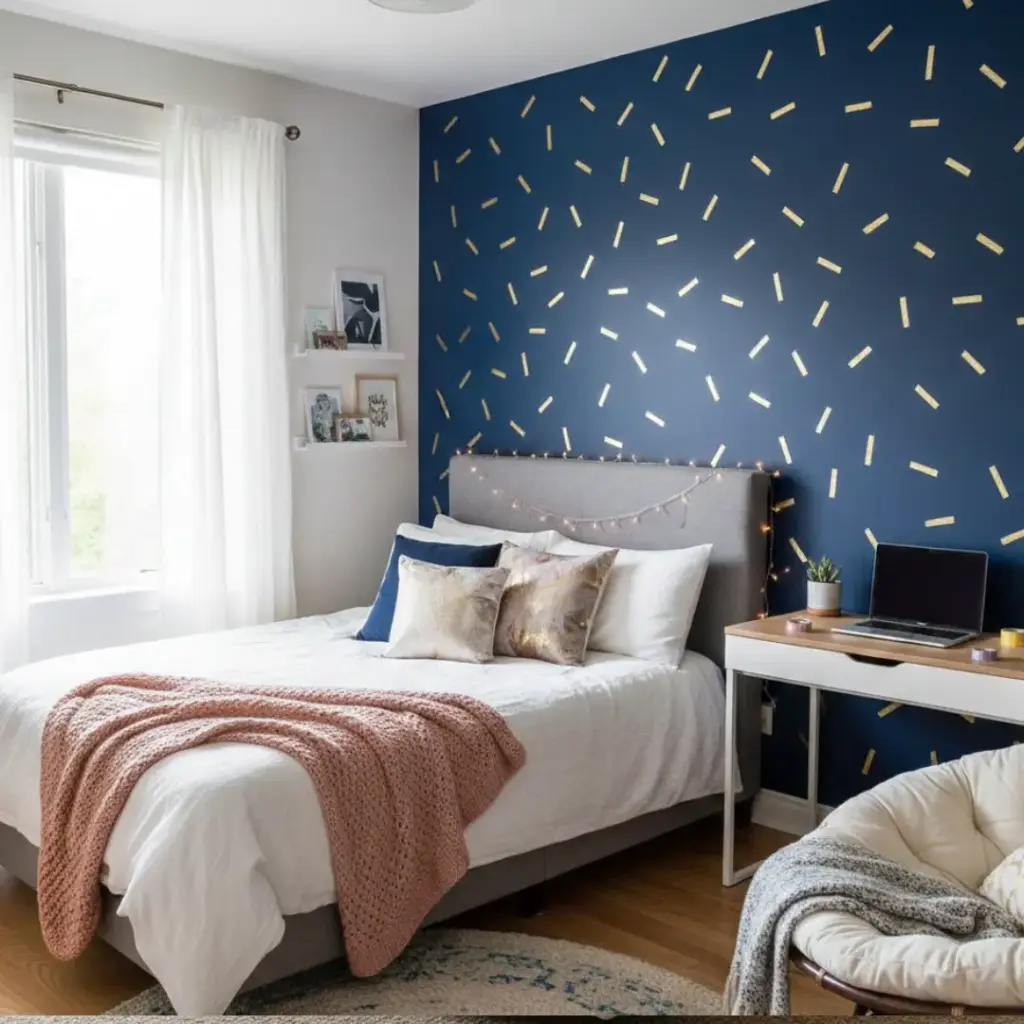
This is for the college students or the indecisive folks. Washi tape is decorative paper tape that comes in endless colors and patterns. You can create geometric shapes, stripes, or skylines directly on the wall.
The beauty of Washi:
- 100% Removable: It leaves absolutely no residue.
- Cheap: We are talking $3 a roll.
- Fun: It’s low stakes. If you hate it, peel it off and start over.
I created a “confetti” wall by cutting small strips of gold washi tape and sticking them randomly over a navy blue wall. It took 20 minutes and looked surprisingly chic.
The “Don’t Screw It Up” Preparation Guide
Before you get excited and start ripping open paint cans, you need to prep. 90% of a good paint or install job is preparation. If you skip this, your accent wall will look like a kindergarten project.
Essential Steps:
- Clean the wall: Dust and grease prevent adhesive and paint from sticking. Wash it down with sugar soap or a water-vinegar mix.
- Fill the holes: Spackle every nail hole. Sand it flush. If you can feel the bump with your eyes closed, you will see it when it’s painted.
- Remove outlet covers: Don’t paint around them. Take them off. It takes thirty seconds.
- Prime: If you are painting a dark wall light, or a light wall dark, primer is non-negotiable. It ensures true color and better adhesion.
Tools You Actually Need (Vs. What The Store Sells You)
You don’t need the entire hardware aisle. Keep your toolkit lean and mean. Here is what I actually use on every single one of these projects.
- A good tape measure: Not the flimsy sewing kind. A metal one that stays stiff.
- Painter’s tape: Spend the extra dollar for the brand name. The cheap stuff leaks.
- A Level: A 2-foot level is standard, but a laser level changes your life.
- Stud finder: Don’t turn your wall into Swiss cheese looking for a stud.
- Sanding block: For smoothing out spackle and rough wood edges.
IMO, buying cheap brushes is a trap. They shed bristles into your paint, and you spend half your time picking them out of the wall. Buy one good angled sash brush and wash it well; it will last you for years.
Design Principles: Choosing Your Vibe
How do you pick between wood, paint, or wallpaper? It comes down to the feeling you want to evoke. Your bedroom is for sleeping (mostly), so the vibe matters.
Consider these factors:
- Texture vs. Color: If your room feels cold, choose wood (texture). If it feels boring, choose a bold paint (color).
- Lighting: Dark walls absorb light. If your room is a cave, a black accent wall might make it feel like a dungeon. Go for lighter wood tones or wallpapers instead.
- Furniture contrast: Your headboard needs to pop against the wall. A grey headboard against a grey wall disappears. Contrast is key 🙂
Final Thoughts
You have 13 DIY bedroom accent wall behind bed ideas at your fingertips. From the simplicity of a painted arch to the architectural drama of board and batten, there is something here for your skill level.
Don’t let the fear of messing up paralyze you. It’s just a wall. If you hate the paint, paint over it. If the wood looks crooked, pry it off. The only way to fail is to leave that wall blank and boring.